
- Trim it with some grosgrain ribbon.
It's a quick and inexpensive way to upgrade a plain lampshade.
Do you remember the blue and white porcelain lamp in the guest bedroom?


I'm pretty happy with the quality of the lamp except that you can see the metal frame through the fabric if you look closely. I guess I got what I paid for.

The best part about this DIY is you can pick any color or width of ribbon you like (stores like Michaels have a wide selection of grosgrain ribbons). You can also easily switch to a different ribbon when you want to update your decor.
Without further adieu, let's get started, shall we?
Things you'll need:
- Fabric glue
- Pair of sewing scissors
- Grosgrain ribbon of your choice
- Paper towel (for wiping off excess glue)

It's the easiest if the lampshade is straight and doesn't angle, like a drum or a rectangular lampshade that has the same circumference at the top and the bottom of the shade.
You just need to 1) measure the circumference of the shade, 2) cut 2 pieces of ribbon slightly longer than the circumference (about a 1/4 of an inch longer), 3) carefully glue them at the top and the bottom of the shade, and 4) Fold under the end of the ribbon and secure the corner with the glue.
But if the shade is angled like this one (the bottom is wider than the top), you need to take a few extra steps to achieve the best result.

1) Measure and cut the ribbon for the each side of the shade, slightly longer than the actual length (about half an inch longer).
When you're done, you'll have four pieces for the top, four pieces for the bottom of the shade.

Next, we are going to glue the ribbon on the lampshade. We'll work on the two narrow sides first, then move onto the two wider sides.

2) Apply glue in small dots directly on the shade about an inch apart. This will make it easier to take the ribbon off when you make a mistake or replace the ribbon later on.

3) Pull the ribbon tightly as you attach it to the shade. Once the ribbon is in its place, use your index finger to secure the ribbon.

4) Glue down the excess ribbon on the corners,

like this.

One narrow side done.
5) Repeat the process on the opposite side.

Now both of the narrow sides are done, we'll move onto the wider sides.
6) Glue the ribbon on the wider side of the shade in the same manner, but here, we'll treat the corners differently.

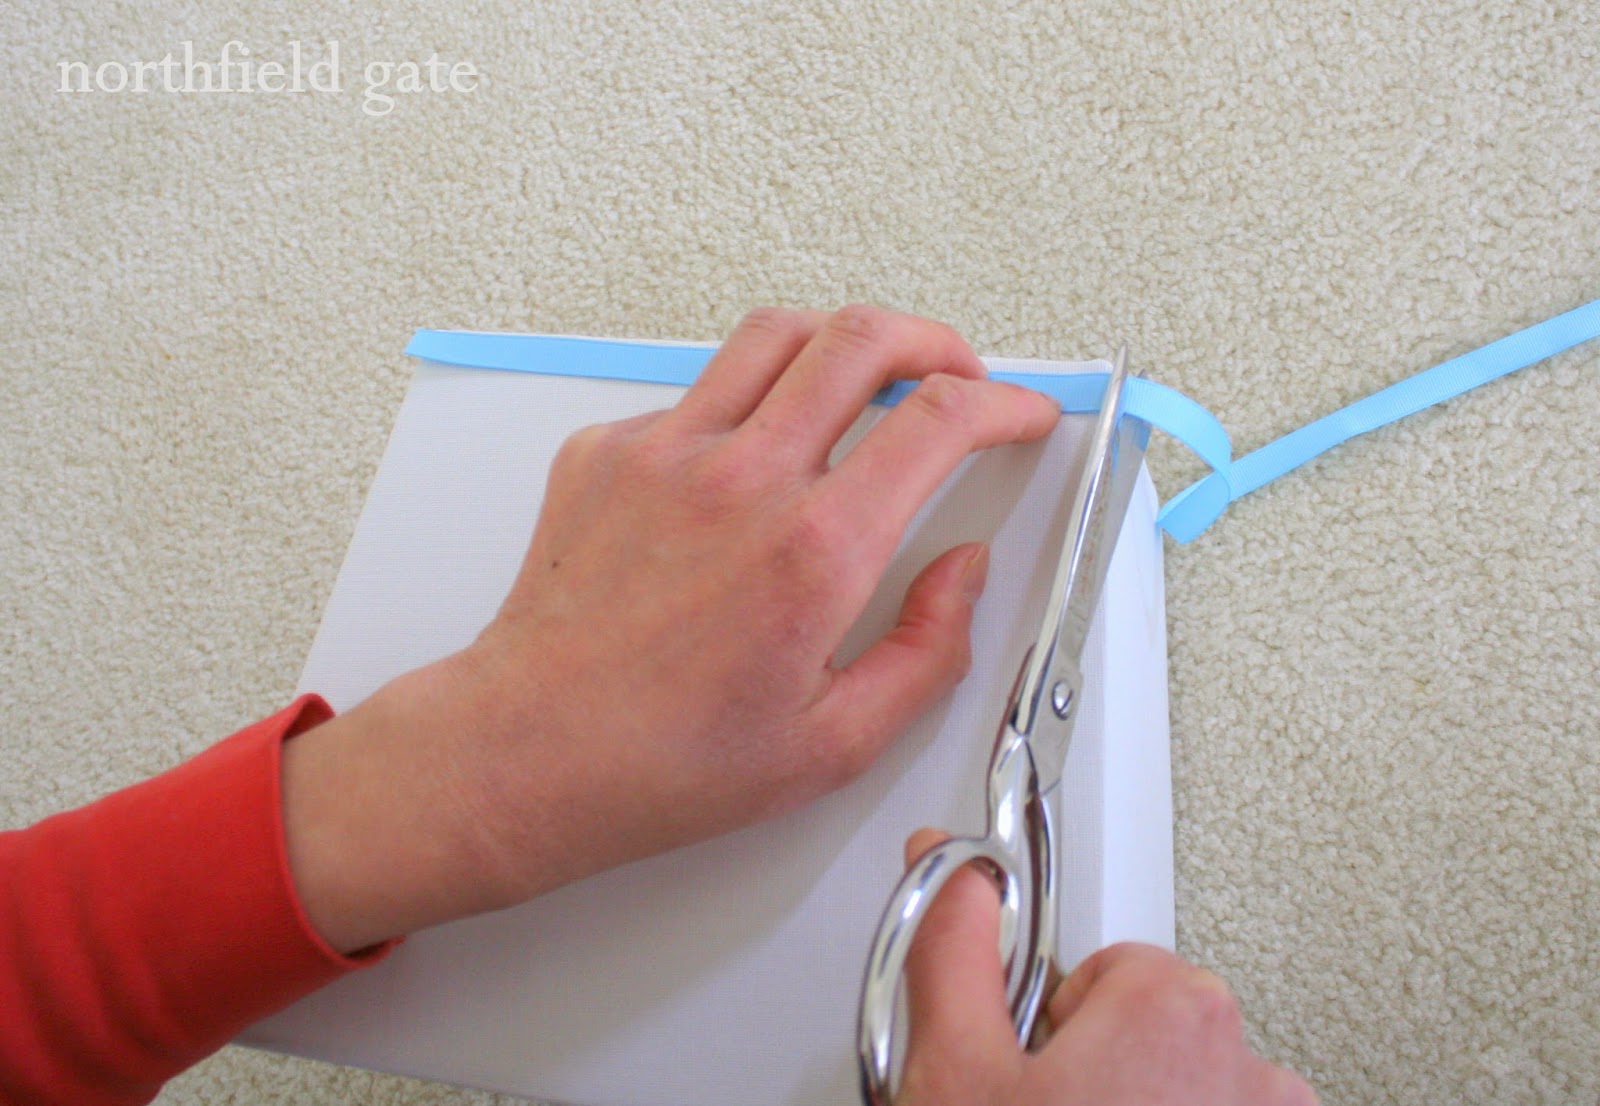
7) Fold under the end of the ribbon so it lines up with the corner.

8) Trim the excess ribbon using the sewing scissors.


9) Glue and secure the folded edge onto the shade.

When it's done, the corner will look like this. Clean without any fraying.

10) Repeat the same process on the opposite side of the shade, and it's complete!


Total cost of the project: $11 ($3 for the ribbon, $9 for the fabric glue)
What do you think?
VERY fun! A bit of zing never hurt any lampshade!
ReplyDeleteCool ...
Yes, exactly! And it's a super easy DIY ;-)
DeleteLovely touch! Everything you do has such a lovely look. Enjoy your blog.
ReplyDeleteKaren
Thank you so much, Karen!! ox
Deletei think it is gorgeous yuko!
ReplyDeleteThank you so much, Janet! oxox
DeleteI love the lamp and it looks extra nice with the new trim. So very pretty, what a nice small touch. The little details really make a difference don't they?
ReplyDeleteThanks Gam! Yes, the little details make a big difference :)
DeleteThis is so pretty! Thank you for sharing! I'm hoping to get a new lamp for our bedroom and this is a great reminder that I can dress up a plain shade :-)
ReplyDeleteThank you Helen! It's fun to personalize a plain shade :)
DeleteThis looks gorgeous. And of course, precisely and perfectly executed. I've done this before, except not as well! Mine looked like it had been made by a drunk and blindfolded crafter. I love that blue and white lamp! I would have thought it was antique.
ReplyDeleteOh let me come over, I will trim your lampshade for you! Lol. Yes, the lamp looks very antique, even though it's an inexpensive reproduction :)
Delete