April 29, 2014

Because small progress is better than no progress

Things progress slow here, much slower than I'd personally like. As you already know, I'm an impatient person and I want things to happen "yesterday."

What would you do when you have a big goal or a dream and you feel so far from achieving that goal?

I make a tentative plan to achieve the goal and start working with the smallest, easiest step.

Because making small progress every day is better than making no progress at all. 

I take the same approach when I decorate our home.   

Making our home pretty makes me feel good, even when I can only take baby steps. Yes, it's frustrating at times how long it takes get where I want it to be, but I know at least I'm moving forward.  

So I made a plan for the foyer that helps me envision the end result and work toward the finish line one step at a time. Taking small steps and celebrating each accomplishment gives me the hope I need to keep going.

Our foyer in need of sprucing up

It's a tentative plan because I will probably change things as I go along. 

I am going to do a blue and white porcelain gallery wall on either sides of the trumeau mirror, similar to this. 
 
Peter Vitale via Veranda

I hung a couple of white and blue plates I had at hand so that I can get the feel for it.


Not bad at all.

I added another plate and a ginger jar to see if I like "the gallery wall" look.


I think I do like it!

I'm going to add a beautiful rug in shades or red, coral, and blue. I wonder if I'll be able to score something like this on craigslist.

Apartment Therapy

And finally, I had to try white paint on the wall, just because... 


I wanted to see if the white paint I used in our family room works better, but I think I'm happier with the original gray: Taking an action to achieve my goal makes me happy, even if it doesn't turn out the way I expected. At least I tried the white paint and I don't have to ever wonder again "what if I liked the white better." 

I make a lot of mistakes when it comes to decorating and life in general, but trying something new and making mistakes helps me develop my preferences. 

I also celebrate things that feed my soul, no matter how small they seem. This helps me stay positive and stay on course.

Antique ginger jar. One of my favorite blue and white things: Surrounding myself with beautiful things makes me happy. 


I think I'm going to make a simple, minimalistic drawing like this for the gilt frame  : Thinking about art and actually making it makes me happy.

Mini.Q

The resin bust with my favorite necklace from Elizabeth Perry Collections: A pretty necklace makes me happy, especially when it's displayed where I can see every day. 
 

Last but not least, these boys make me happy (most of the time).

photo credit: my mother-in-law, Linda

What are your dreams? 

Do you make small progress every day to make your big dream come true?


April 25, 2014

Blue & White

Thank you so much to everyone who commented on my previous post.

You shared so many great ideas on how to update our foyer- from adding my favorite blue & white ware, pulling a color from the painting, to adding colors and textures with a fabric, and so many more! I think all of them are such fantastic ideas. I hope you could come over to my house and help me decorate!

I LOVE the idea of adding blue and white ware to our foyer. That's one of the color combinations I'm drawn to, and I love the way the crispness of white and blue makes any room come alive. 

Sylvie Becquet
Peter Vitale
Sylvie Becquet
Carolyne Roehm
All the above images from Veranda

Grace Happens
Grace Happens

Our Guest Bedroom

I will go through all of the suggestions you gave me and decide what I'm going to do with the foyer over the weekend. Thank you, again, for your suggestions!

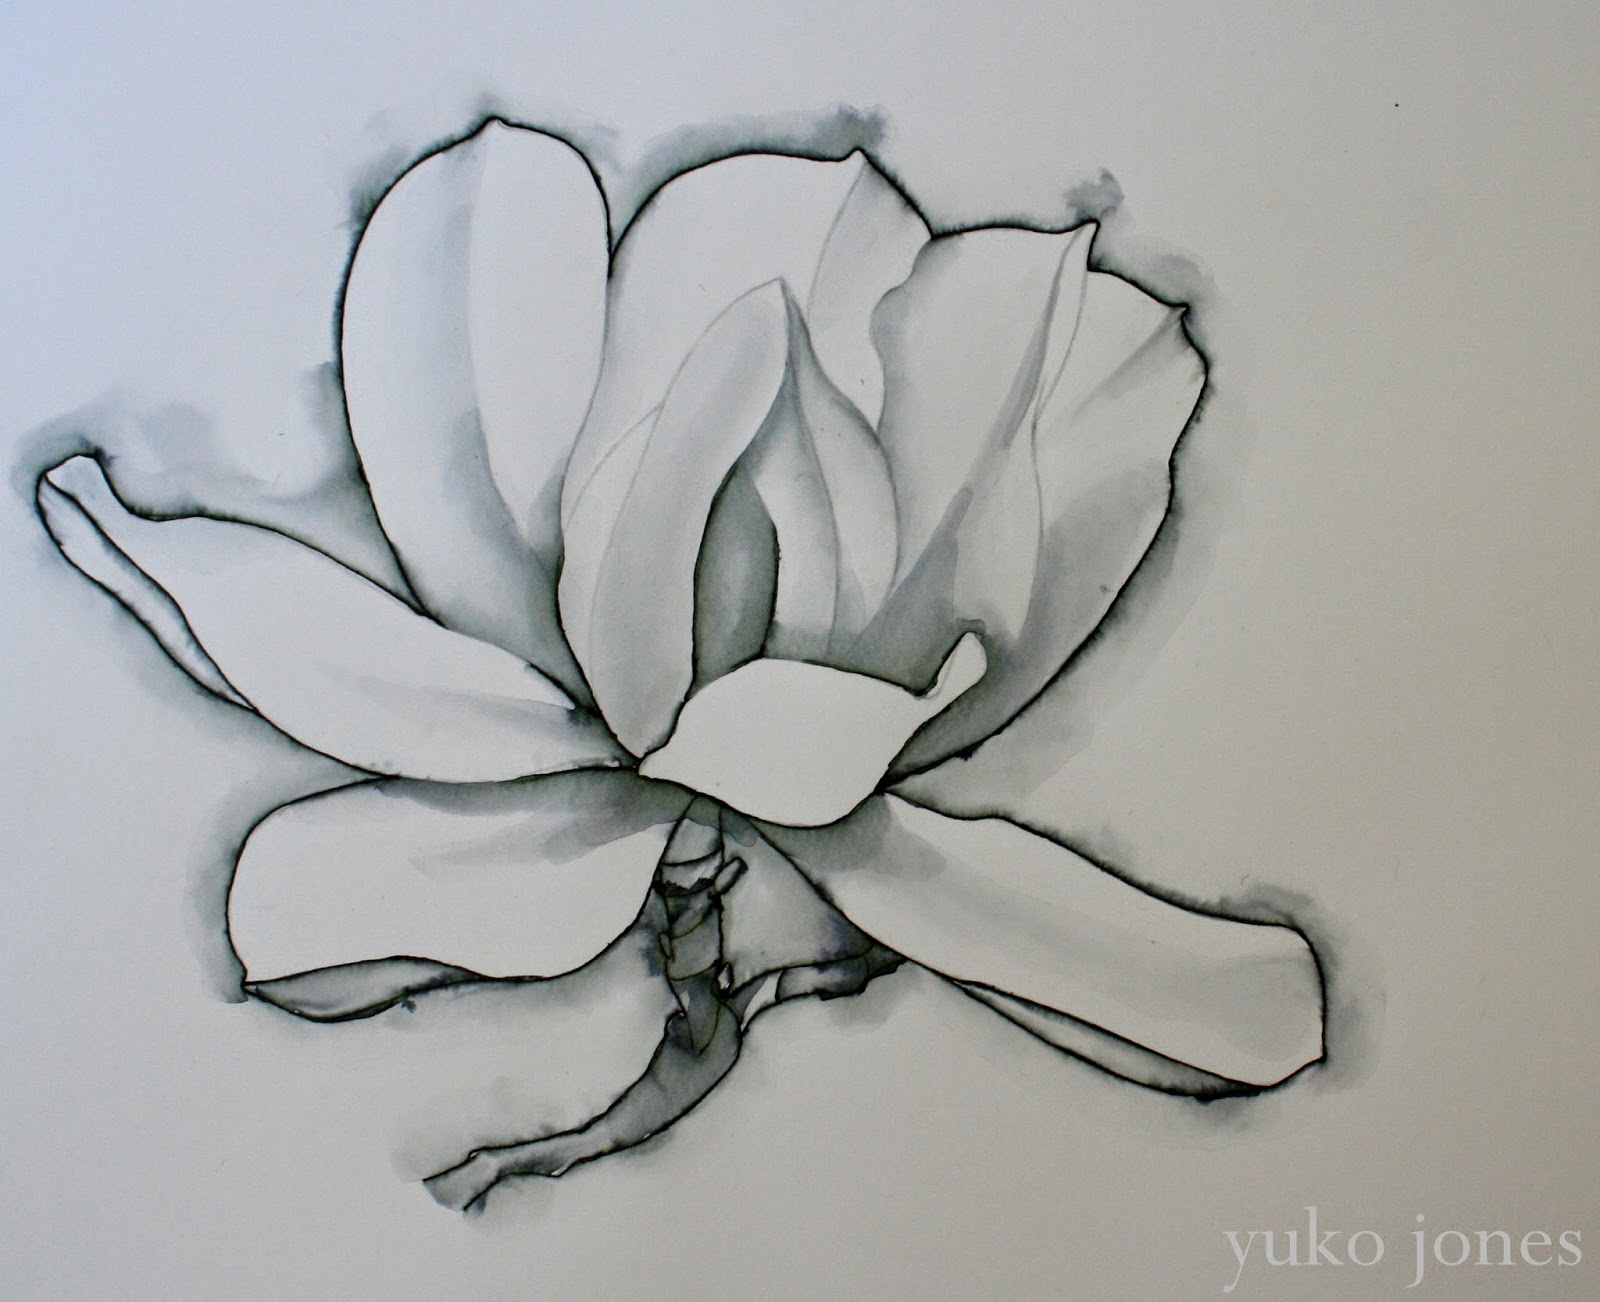
On the other note, here is my new artwork I started this week: Japanese Magnolia. This is another project I'll be working on this weekend. I'm not sure where I'm going to take this from here, but I know I will have to listen to it and see what it wants to become

"Basically, art is just a way to think.
 It's like standing in the wind and letting it pull you
 in whatever direction it wants to go." 

                                                             Kiki Smith

I can't wait to share with you the finished artwork next week! 

Have a lovely weekend. 


April 22, 2014

Our Foyer Today

How was your weekend?  

We had a great time celebrating Easter with our family.

The kids had a lot of fun hunting for Easter eggs.


 Cousins. They are the best buds and so adorable together.


After a week long Easter break, my 5-year-old went back to school yesterday. As much as I enjoy having him around, it's nice to get back into our normal routine.

I recently framed one of my paintings, Contemplating, and have found a place for it. My 5-year-old decided to call it "Pompom Head," and that somehow sounds more fitting than my original title.

Resin Bust and "Pompom Head"

It sits right behind the DIY painted resin bust in the foyer.


Our foyer is in need of some serious intervention. The DIY painted trumeau mirror hangs where the Hollywood Regency mirror used to be (the HR mirror is currently in the guest bedroom). I haven't decided how exactly I want to decorate the wall yet. 

The foyer has been the most challenging space to decorate due to its shape and lighting. The hallway that leads to the kitchen is so narrow that I can't put any furniture deeper than 13 inches deep under the trumeau mirror. We only have small north-facing windows by the front door, so this area gets very little natural light throughout the day. Do you have a room like that in your home? 

Since this is the place you see when you first walk in, I want something interesting with a big impact. How can I transform this space from drab to fab? 

As always, I went to my Pinterest board for some inspiration. Pinterest has been such a helpful tool for me to gather pictures for inspiration and learn from them - I would analyze how some designs work and some don't. I'm a visual learner so it works perfect for me. I wouldn't know what to do without it!

Here are some of my favorite vignettes.

Furlow Gatewood. via House Beautiful
 
Jonathan Berger. via House Beautiful
Suzanne Rheinstein. via Elle Decor
David Duncan Livingston. image via Stagetecture
image via Traditional Home
Ashley Whittaker. image via The Foo Dog Ate My Homework
Thornton Designs. image via House of Turquoise

Across from the resin bust and painting is the front door with the little windows.


Looking into the foyer from the kitchen.


Well, I tightly cropped the above picture so it'll look decent. But our foyer looks like this in reality. Part of the ceiling has been out for quite some time. Our goal is to have it finally fixed this summer! 

We have a long way to go! I'm going to start making some small changes this week, and I'm pretty excited about it.

Any suggestions?

April 18, 2014

Egg-stra Random Friday Post

Happy Fry-day, everyone!


Two more days until Easter and my mind has been preoccupied with all things eggs. Today, I couldn't help but indulge myself with egg-straordinary (?) egg puns and jokes!  

image via Pinterest. Scott Hilburn

Haha! Love anything Dr. Seuss.

image via Pinterest. Help me source the original?

Duh.
I was going to crack the egg and ended up smashing it. But it sure felt good smashing the egg.

2 Be Positive
Cute!

And finally...

Mr. Barns by Me

Hahaha!
I had a great time drawing Mr. Barns on the egg. Egg-cellent...

The fried egg in the first picture turned into my Fry-day brunch (okay, enough?)


I paired it with a slice of freshly baked bread from Wegmans' bakery, and baby spinach & kale salad. 

I enjoy having salad for lunch. I usually put together whatever the veggies I have in the refrigerator and whip up some homemade dressing. 

This time I used,
- Baby spinach
- Organic kale
- Tomato
- Celery
- Olive
- Feta cheese

For the dressing I whisked together the equal amount of freshly squeezed lemon juice and extra virgin olive oil, a few drops of apple cider vinegar (red wine vinegar works great, too) and salt and pepper. Toss the vegetables and dressing together and it's ready to serve.

Today, I also packaged my original artwork, Daughter of The Wind,  to be shipped to my dear friend, Joy.


When Joy told me she fell in love with this artwork and couldn't live without "her" (okay, I exaggerated a little), I knew this belongs to her. I'm so happy this goes to a good home. 

Good-bye Daughter of The Wind. I will miss you!

I was going to be less critical and be more positive during this season of Lent, but fasting criticism was much harder than I expected. I failed miserably. I guess I will have to continue working on this. Hopefully, some day, I'll get better at it. 

Happy Easter, Happy Passover, and Happy spring break, everyone! 

No matter where you live, where you are in life, what faith you may or may not have, may your weekend be filled with love and joy.

Have a egg-stra special weekend! 


April 17, 2014

DIY | Ribbon Trimmed Lampshade

What is the easy way to personalize a plain retail lampshade?       
        - Trim it with some grosgrain ribbon.


It's a quick and inexpensive way to upgrade a plain lampshade. 

Do you remember the blue and white porcelain lamp in the guest bedroom?


The lamp looked like this when I brought it home. It's an inexpensive lamp from Marshall's and the lampshade came with the lamp.


I'm pretty happy with the quality of the lamp except that you can see the metal frame through the fabric if you look closely. I guess I got what I paid for. 
 

So, I decided to take this shade from drab to fab by trimming it with a light blue grosgrain ribbon I picked up from Michaels. It will hide the ugly metal frame peeking through the fabric. It will also help bring together the mix of colors in the room.

The best part about this DIY is you can pick any color or width of ribbon you like (stores like Michaels have a wide selection of grosgrain ribbons). You can also easily switch to a different ribbon when you want to update your decor. 

Without further adieu, let's get started, shall we?

Things you'll need:
- Fabric glue
- Pair of sewing scissors 
- Grosgrain ribbon of your choice 
- Paper towel (for wiping off excess glue)


It's the easiest if the lampshade is straight and doesn't angle, like a drum or a rectangular lampshade that has the same circumference at the top and the bottom of the shade.

You just need to 1) measure the circumference of the shade, 2) cut 2 pieces of ribbon slightly longer than the circumference (about a 1/4 of an inch longer), 3) carefully glue them at the top and the bottom of the shade, and 4) Fold under the end of the ribbon and secure the corner with the glue.

But if the shade is angled like this one (the bottom is wider than the top), you need to take a few extra steps to achieve the best result.


1) Measure and cut the ribbon for the each side of the shade, slightly longer than the actual length (about half an inch longer). 


When you're done, you'll have four pieces for the top, four pieces for the bottom of the shade.


Next, we are going to glue the ribbon on the lampshade. We'll work on the two narrow sides first, then move onto the two wider sides.


2) Apply glue in small dots directly on the shade about an inch apart. This will make it easier to take the ribbon off when you make a mistake or replace the ribbon later on.


3) Pull the ribbon tightly as you attach it to the shade. Once the ribbon is in its place, use your index finger to secure the ribbon


4)  Glue down the excess ribbon on the corners,


like this.


One narrow side done. 

5) Repeat the process on the opposite side. 


Now both of the narrow sides are done, we'll move onto the wider sides.

6) Glue the ribbon on the wider side of the shade in the same manner, but here, we'll treat the corners differently. 
 

7) Fold under the end of the ribbon so it lines up with the corner. 


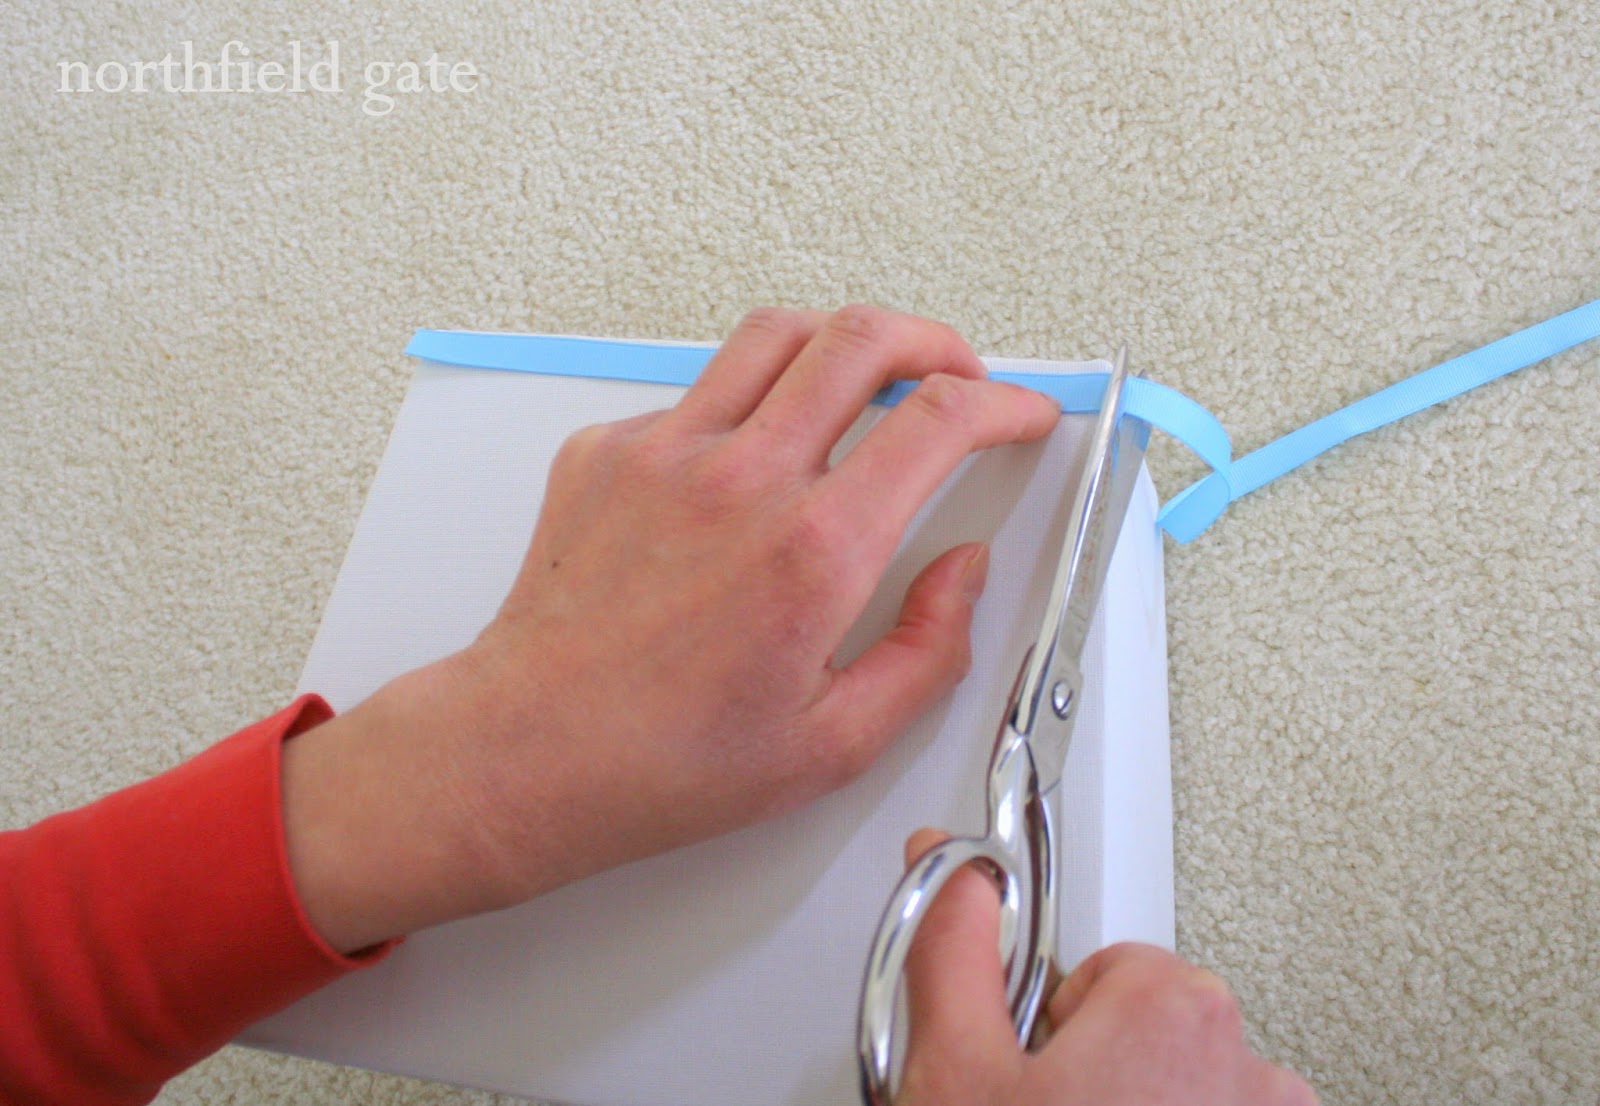
8) Trim the excess ribbon using the sewing scissors. 


9) Glue and secure the folded edge onto the shade.


When it's done, the corner will look like this. Clean without any fraying.


10) Repeat the same process on the opposite side of the shade, and it's complete!


Total cost of the project: $11 ($3 for the ribbon, $9 for the fabric glue)

What do you think? 

 
Related Posts Plugin for WordPress, Blogger...