

She looked like this.

Ever since I saw this bust featured in House Beautiful a few (several?) years ago, I've wanted one for our home.
 |
| Dana Abbott & Kim Fiscus, image via House Beautiful |
Then, I came across this inexpensive resin bust at Hobby Lobby for $40 this weekend. The price was reduced from the original $70, and I couldn't grab it quick enough! I didn't care for its faux finish, but I knew this was something I could change.
How ironic is it to come across an exciting DIY project, right after I told you I'm not a DIY kind of girl? I guess this is how life rolls.
A close-up of the faux finish in all its glory. Mary looks very sad in this picture. She probably didn't like the original faux finish either.

As you can see in the picture, the bust has a bumpy surface similar to a stone bust. I've seen many resin busts spray painted in glossy white, but I decided this one needed more of a chalky texture.
What can I use to create a chalky texture? Chalk Paint, of course!

I grabbed a few cans of my trusty ASCP and a paint brush and went to town painting. Yes, I used the same paint I used for the Trumeau Mirror Makeover and Brick Fireplace Makeover. Is there anything ASCP can't do?
Things you'll need:
- Clean wet rag
- ASCP Old White (creamy white)
- ASCP Paris Grey (light gray with blue undertone)
- ASCP Pure White
- Paint brush
- Drop cloth
- Roll of paper towel (to wipe off excess paint off the brush)

Instructions:
1. Wipe clean the bust with a clean wet rag. The cleaner the surface, the better the paint will stick.
2. Mix "Old White" and "Paris Grey" to create a shade of light gray you like. I probably mixed about a 1/3 cup of Old White and a tablespoon or less amount of Paris Grey.
3. Paint the bust using the "Old White/Paris Grey" mixture. Try to cover all the nooks and crannies and spread the paint as evenly as possible. Allow the first coat of paint to dry completely.
After a coat of "Old White/Paris Grey" mixture. This is what the bust looked like.

The color was almost identical to the wall color and it was disappearing into the background. It also looked a little flat and I wanted to add some texture to it. I followed three more steps to achieve a more authentic look.
4. Dry brush the bust using "Pure White" to highlight the high surface areas. Make sure your brush is completely dry, and apply only a small amount of pint on the tip of the brush. Any excess paint on the brush should be wiped off with a paper towel. Allow the paint to dry completely.
5. Dab "Paris Grey" on the bust using your fingertip to create an aged effect. The bust will look "dirty" after this step, but don't let it discourage you. Most of the dark spots will disappear under another layer of paint (next step). Allow the paint to dry.
6. Dry brush using "Pure White" over the darkened areas to complete the aged effect. I gently tapped the bust with the brush to soften the edges of the dark spots.

What do you think? I think it looks much better and more authentic than it originally was. I'm still debating whether or not to wax the bust. If I do, I will just do one coat of ASCP Clear Wax.

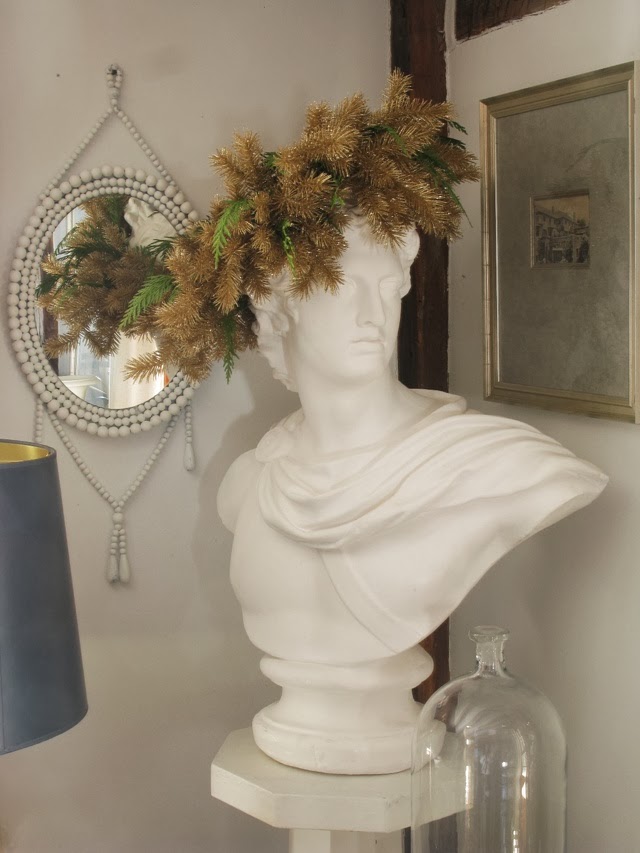
The best part of having a bust is to decorate it.
 |
| Eddie Ross |
 |
| Nesting Place |
 |
| image via And George |
 |
| image via And George |
Possibilities are endless... I can't wait to decorate mine!
I don't make a habit of commenting on ones bust, but this is lovely! It looks SO much better. I think she looks perfect with a matte finish. I admire them too and hope to stumble across one as well. I love the way Mr. Ross's is decorated. I have a cement puti who I decorate for Christmas. I'll have to send you a photo of him. You did a great job!
ReplyDeleteThank you!! I'm pretty excited about how Mary turned out and now I get to decorate her (the best part). I love Eddie's work, too! He is always an inspiration to me. Send me a photo of your little guy - I'd love to see him ;-) ox
DeleteShe looks beautiful Yuko; great find!
ReplyDeleteThank you, Gam!! ox
DeleteSA is so funny.
ReplyDeleteall my busts (!) are outside in the garden. your bust (!) is beautiful. x
You are funny too, Janet! Haha! I have a bust (!) (well, actually a statue) that lived outside and got damaged by an icicle this winter. I'm thinking about bringing her inside to see she fits there. Yay or nay to bring a outdoor element indoor?
DeleteAmazing makeover, Yuko! I think Mary looks so much happier :) Stephen Andrew is a hoot, I think I need a bust now!!!
ReplyDeleteThanks Deni!! ox
DeleteHow should I affix sea shells to my mine?
ReplyDelete